What’s The Proper Way To Install And Adjust A Bike Rack On My Car?
Imagine you have just purchased a brand new bike and you’re eager to hit the open road for some exhilarating adventures. But there’s one problem – you need a bike rack for your car. No worries! In this article, we will guide you through the proper installation and adjustment process for a bike rack on your car, ensuring that you can transport your bike safely and securely wherever you go. So, let’s get started on this exciting journey of exploring the ins and outs of installing and adjusting a bike rack on your car!
Choosing the Right Bike Rack
Choosing the right bike rack for your car is essential to ensure a secure and hassle-free transportation experience. With so many options available in the market, it can be overwhelming to make a decision. However, by considering a few key factors, you can easily find the perfect bike rack for your specific needs.
Firstly, determine the number of bikes you plan to transport. Bike racks come in various sizes, from those designed to carry a single bike to those capable of transporting multiple bikes. Assess your requirements and choose a rack that can accommodate your bikes comfortably.
Consider the type of car you have. Different racks are compatible with different car models, so it’s important to select a bike rack that can be safely attached to your vehicle. Roof racks, hitch-mounted racks, trunk-mounted racks, and spare tire-mounted racks are some of the common types. Research the compatibility of each with your car before making a decision.
Another crucial factor to consider is the security of your bikes during transportation. Look for bike racks that offer sturdy locking mechanisms to prevent theft. Additionally, opt for racks that have adjustable features, allowing you to customize the fit to your specific bike frame.
Preparing Your Car and Bike Rack
Before installing the bike rack, it’s necessary to prepare both your car and the rack itself. Begin by cleaning the surface where the bike rack will be attached. Remove any dirt, debris, or wax residue to ensure a secure connection.
Inspect the bike rack for any signs of damage or wear. Check parts such as straps, buckles, and hooks to ensure they are in good condition and functioning properly. If you notice any issues, it’s crucial to address them before proceeding with the installation.
Lubricate any moving parts of the bike rack to ensure smooth operation. This will not only make it easier to adjust and install but also extend the lifespan and functionality of the rack.
Installing the Bike Rack
Installing a bike rack may seem daunting, but it’s a relatively straightforward process when you follow the proper steps. Begin by carefully reading the manufacturer’s instructions provided with the rack. These instructions are specific to each rack model and will guide you through the installation process.
Next, identify the appropriate attachment points on your car for the chosen rack type. For roof racks, you may need to locate and mount the rack onto the crossbars or side rails. Hitch-mounted racks require attaching to the hitch receiver, while trunk-mounted racks need to be placed on the back of your car.
Once you have identified the attachment points, securely fasten the bike rack onto your car according to the manufacturer’s instructions. Ensure that all bolts and straps are tightly secured to avoid any movement or instability during transportation.
Securing the Bike Rack to Your Car
After installing the bike rack on your car, it’s crucial to ensure that it is securely attached. Give the rack a gentle shake to check for any wobbling or looseness. If you notice any movement, readjust the attachment points and tighten the straps or bolts accordingly.
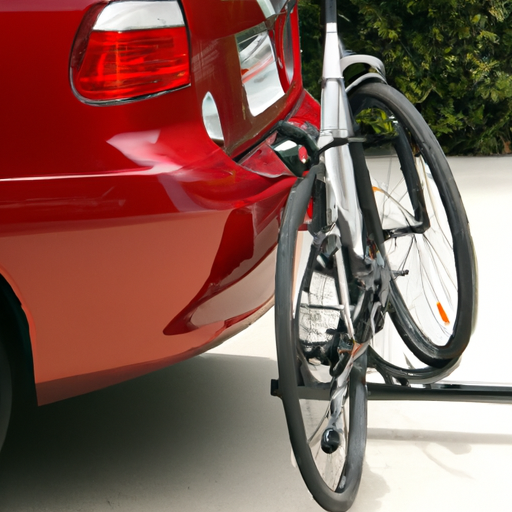
For roof racks, make sure that the rack is centered and aligned properly. Double-check the attachment points to ensure they are securely fastened to the crossbars or side rails. For hitch-mounted racks, verify that the rack is inserted correctly into the hitch receiver and properly secured with a locking pin or mechanism.
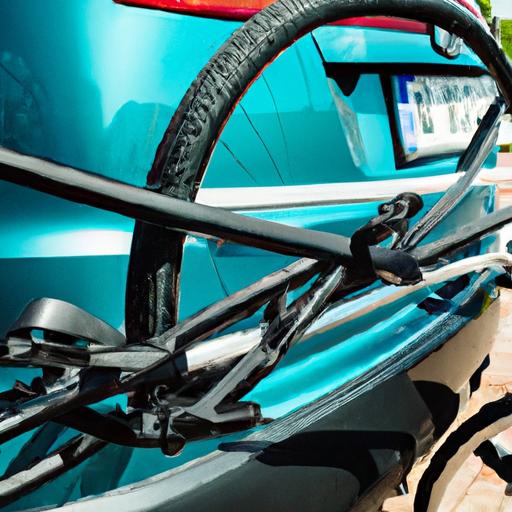
Trunk-mounted racks should be firmly attached to the rear of your car, ensuring a secure fit against the trunk or hatch. Take extra care to ensure that the rack’s straps are tightly fastened, as any looseness can result in instability during travel.
Positioning the Bike Rack Correctly
Proper positioning of the bike rack is crucial for both your car’s safety and the safety of the bikes being transported. Ensure that the rack doesn’t obstruct your taillights, license plate, or rearview mirror. It’s important to maintain full visibility while driving, so position the rack in a way that allows you to see clearly.
When using a roof rack, be mindful of the overall height of your car, especially if you plan to park in low-clearance areas. Take note of height restrictions in parking lots or garages to avoid potential damage to your car or bikes.
For hitch-mounted racks or trunk-mounted racks, ensure that the rack doesn’t interfere with the operation of your car’s trunk or rear hatch. You should still be able to open and close these areas without any obstructions.
Adjusting the Bike Rack for Stability
Once the bike rack is securely attached and properly positioned, it’s crucial to adjust it for stability. This step is essential to prevent any movement or shifting of the bikes during transportation, ensuring a safe journey for both your car and the bikes.
If your bike rack has adjustable features, such as straps or arms, utilize them to snugly fit your bikes. Adjust the straps or arms based on the size and shape of your bike frames. The goal is to ensure that the bikes are held firmly in place without any wobbling or excess movement.
Avoid over-tightening the straps or arms, as this could damage your bike frames. Find the right balance between a secure fit and avoiding any unnecessary pressure on your bikes.
Loading Your Bikes onto the Rack
Loading your bikes onto the rack should be done with care and precision to prevent any damage or accidents. Start by preparing your bikes for transportation. Remove any loose accessories, such as water bottles or saddlebags, and ensure that the tires are properly inflated.
If you have multiple bikes, it’s best to load them one at a time, starting from the furthest bike from the car. This allows for easier access and maneuvering.
Lift each bike onto the rack and carefully position the frame onto the designated spots. For roof racks, this usually means hooking the frame onto the trays or clamping mechanisms. Hitch-mounted racks typically have individual adjustable arms that hold the bikes in place. Trunk-mounted racks often use straps or cradles to secure the bikes.
Ensure that the bikes are evenly distributed on the rack to maintain stability while driving. Avoid overcrowding the rack, as this can increase the risk of bikes rubbing against each other or falling during transit.
Securing the Bikes to the Rack
After loading the bikes onto the rack, it’s essential to secure them properly to prevent any accidents or damage during transportation. Begin by double-checking that each bike is securely positioned on the rack.
For roof racks, tighten the straps over the tires and frame to ensure a snug fit. For hitch-mounted racks, adjust the individual arms or clamps to firmly hold each bike in place. Trunk-mounted racks require securing the straps tightly around the bikes’ frames or wheels, depending on the construction of the rack.
Give each bike a gentle shake to verify that it is securely fastened. Any movement may indicate that the bikes are not properly secured, so readjust the straps or arms as needed.
Testing the Rack and Safety Considerations
Before embarking on your journey, it’s essential to test the bike rack for stability and safety. Give the entire setup a thorough inspection, ensuring that all attachment points are still secure, and all straps or arms are tightly fastened.
Take a short test drive, paying close attention to any unusual noises or vibrations. If you notice anything out of the ordinary, pull over safely and check the bike rack immediately. It’s better to address any issues before hitting the road.
During your trip, be cautious of potential hazards, such as low-hanging branches or uneven road surfaces. Adjust your driving style accordingly to minimize any excessive stress on the bike rack and bikes.
Lastly, adhere to any weight limits specified by the bike rack manufacturer. Overloading the rack can compromise its stability, potentially causing damage to both your car and the bikes.
Removing the Bike Rack and Storing Properly
After reaching your destination, it’s time to remove the bike rack and store it properly until your next adventure. Begin by loosening all the straps or arms, carefully removing them from the bikes. Ensure that the bikes are free from the rack and set them aside safely.
Next, remove the bike rack from your car, following the reverse process of installation. Take your time to avoid any accidental damage to your vehicle.
Inspect the bike rack for any signs of wear or damage and address any issues before storing it. Clean the rack thoroughly, removing any dirt or debris that may have accumulated during the trip. Lubricate any moving parts as needed to ensure the longevity and functionality of the rack.
Store the bike rack in a safe and dry location, protected from extreme temperatures or harsh weather conditions. If possible, disassemble any removable parts and store them separately to minimize the space needed for storage.
By following these steps, you can confidently install, adjust, and utilize a bike rack on your car. Enjoy the freedom of carrying your bikes wherever your adventures take you while ensuring the utmost safety for both your car and bikes. Happy cycling!


