How Do I True A Bicycle Wheel That’s Out Of Alignment?
If you find yourself with a wobbly bicycle wheel, fear not! This article will guide you through the simple steps of truing a bicycle wheel that’s out of alignment. With some basic tools and a little patience, you’ll be back on the road with a smooth and steady ride in no time. So grab your wrench and let’s get started!
Inspecting the Wheel
Checking for Visible Damage
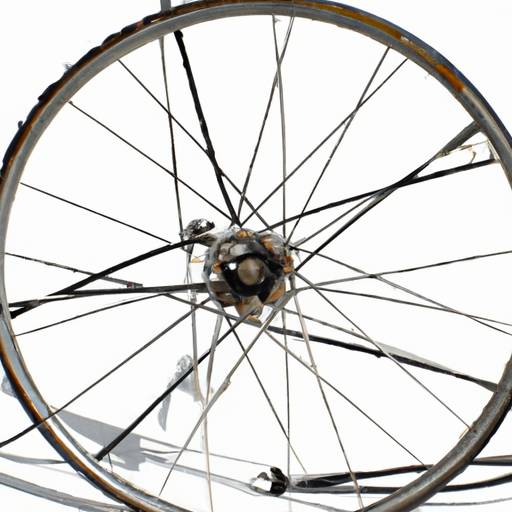
Before you start truing your bicycle wheel, it’s important to inspect the wheel for any visible damage. Look for signs of bent or twisted spokes, cracks in the rim, or any other noticeable deformities. If you spot any damage, it is crucial to address it before attempting to true the wheel. Continuing with a damaged wheel could lead to further problems down the line, so it’s best to fix any visible issues first.
Checking for Loose Spokes
Loose spokes can also cause wheel misalignment and affect the overall stability of your bike. To check for loose spokes, gently squeeze adjacent spokes together with your fingers. If any of the spokes are significantly looser than the others, they may need adjustments. Loose spokes can be tightened using a spoke wrench, which allows you to twist the spoke nipple and increase tension until it feels evenly tightened.
Checking for Axle Misalignment
Axle misalignment is another common issue that can lead to a wobbly wheel. To check for axle misalignment, first, flip your bike upside down and spin the wheel. Watch the gap between the brake pads and the rim as it spins. If you notice the gap changing in width, it indicates an axle misalignment. In this case, you may need to adjust the positioning of the axle using the appropriate tools to ensure it is centered within the fork or frame.
Preparing the Tools
Gathering the Necessary Tools
To properly true your bicycle wheel, you’ll need a few essential tools. These include a spoke wrench, which allows you to adjust the tension of the spokes, a truing stand, which provides a stable platform for working on the wheel, and a bicycle pump to check and adjust tire pressure. Additionally, it’s always a good idea to have a rag or towel on hand to clean off any dirt or debris from the wheel during the truing process.
Ensuring the Wheel is Secure
Before you begin adjusting the spokes, it’s crucial to ensure that the wheel is securely mounted. If you have a truing stand, attach the wheel securely to it so that it remains stable throughout the truing process. If a truing stand is not available, you can use your bike frame as a substitute by securing the bike in a stationary position. This will prevent the wheel from moving or wobbling as you make adjustments.
Adjusting the Spokes
Understanding Spoke Tension
Spoke tension plays a crucial role in keeping a bicycle wheel true and properly aligned. Each spoke contributes to the overall tension in the wheel. Understanding how changes in spoke tension affect the alignment is key to successfully truing a wheel. Tightening a spoke, for example, pulls the rim in the direction of that spoke, while loosening a spoke will allow the rim to move away from that direction. It’s essential to be mindful of these adjustments and make them in small increments to achieve the desired alignment.
Identifying the Problem Areas
Once you’ve inspected your wheel and gathered the necessary tools, it’s time to identify the specific problem areas that need adjustment. Spin the wheel slowly and observe any noticeable wobbles or side-to-side movements. These areas of misalignment will typically indicate which spokes need adjustment. It’s important to identify the problem areas before proceeding to ensure that you focus your efforts on the correct spokes.
Tightening or Loosening Spokes
With your problem areas identified, you can begin adjusting the spokes. Using your spoke wrench, you’ll tighten or loosen the spoke nipples to increase or decrease tension on the corresponding spokes. If a section of the wheel is deviating to one side, tighten the spokes on the opposite side of the deviation. If a section is deviating to the left, tighten the spokes on the right side, and vice versa. Make small adjustments, typically no more than a quarter to a half turn of the spoke wrench at a time, to gradually bring the wheel back into alignment.
Using a Truing Stand
Attaching the Wheel to the Truing Stand
A truing stand provides a stable and precise platform for truing your bicycle wheel. To use a truing stand, attach your wheel securely to the stand using the quick-release or axle adapters provided. Ensure that the wheel is snugly seated in the stand, allowing it to spin freely without any wobbling or resistance.
Adjusting the Truing Stand for Alignment
Once your wheel is securely attached to the truing stand, you can adjust the stand to align the wheel correctly. Use the truing stand’s adjustment knobs or screws to position the gauge or indicator close to the wheel rim, ensuring it is not touching the rim itself. The gauge will help you visualize any deviations or misalignments as you make adjustments to the spokes.
Truing the Wheel Laterally
Identifying Lateral Misalignment
Lateral misalignment, or side-to-side wobbling, is a common issue that can be easily corrected through truing. To identify lateral misalignment, position yourself so that you can observe the wheel from directly above or below. Look for any noticeable deviations where the rim moves closer or further away from the center. These deviations indicate areas of lateral misalignment that need adjustment.
Tightening or Loosening Spokes to Correct Lateral Alignment
To correct lateral misalignment, you’ll need to adjust the spoke tension on either side of the affected area. If the rim deviates to the left, tighten the spoke nipples on the right side of the wheel, and if it deviates to the right, tighten the left side spokes. By doing this, you are pulling the rim toward the opposite direction of the deviation.
Checking Alignment Progress
As you make adjustments to correct lateral misalignment, it’s important to periodically check your progress. Spin the wheel and observe if the deviations are resolving or if there are any new areas of misalignment. Remember to make small, incremental adjustments to the appropriate spokes as needed. Continue this process until the lateral alignment of the wheel is corrected.
Truing the Wheel Radially
Identifying Radial Misalignment
Radial misalignment refers to any up-and-down movements or bumps on the wheel’s rim. To identify radial misalignment, position yourself so that you can view the wheel from the side. Look for areas where the rim is not uniformly aligned with the center point. These deviations indicate sections that will require adjustments.
Adjusting Spoke Tension to Correct Radial Alignment
To correct radial misalignment, you’ll need to adjust the spoke tension across the entire wheel. If an area of the rim is lower or higher than the rest, you’ll need to tighten or loosen the appropriate spokes to bring it back into alignment. If the section is lower, tighten the spokes on either side of the bump. Conversely, if the section is higher, loosen the spokes in that area.
Ensuring Even Spoke Tension
While correcting radial misalignment, it’s crucial to ensure that the spoke tension is evenly distributed across the wheel. Uneven spoke tension can lead to further problems and affect the overall stability of the wheel. As you make adjustments, periodically check for even spoke tension by gently squeezing pairs of adjacent spokes together. They should have a consistent firmness throughout the wheel.
Checking the Dish
Understanding Wheel Dish
Wheel dish refers to the alignment of the rim with the hub. A well-dished wheel has a uniform distance between the rim and the locknuts on both sides of the hub. Checking the dish is important to ensure proper wheel alignment and prevent any issues arising from an imbalanced wheel.
Checking Dish Alignment
To check the dish alignment, flip your bike upside down and position yourself so that you can look directly at the wheel and hub from the side. Compare the gap between the rim and the locknuts on both sides of the hub. If the gaps are noticeably different, it indicates the wheel’s dish is off. To correct dish misalignment, make slight adjustments to the spoke tension on either side of the hub until the rim is evenly spaced from the locknuts.
Repeating the Truing Process
Checking the Alignment Frequently
Throughout the truing process, it’s crucial to check the wheel’s alignment frequently to ensure that your adjustments are having the desired effect. Continue to spin the wheel and observe any remaining wobbles or misalignments. Address these areas with minor adjustments to bring your wheel closer to true.
Making Small Incremental Adjustments
When truing a bicycle wheel, it’s essential to make small incremental adjustments to spokes rather than larger, drastic changes. This allows for fine-tuning and prevents overcorrection. By making small adjustments and gradually working your way through the problem areas, you’ll have better control over the final alignment.
Repeating the Process until the Wheel is True
Truing a wheel is often an iterative process that may require multiple rounds of adjustments. As you continue to make incremental changes and check the alignment, you’ll be able to bring your wheel closer to a true state. Repeat the process as needed until the wheel spins smoothly without any noticeable wobbles or misalignments.
Replacing Damaged Spokes
Identifying Damaged Spokes
During the inspection phase, it’s important to identify any damaged spokes that may compromise the integrity of your wheel. Look for spokes that are visibly bent, cracked, or have broken ends. Damaged spokes can negatively impact the wheel’s ability to hold alignment and may need to be replaced before you can successfully true the wheel.
Removing and Replacing Damaged Spokes
If you find a damaged spoke, it’s necessary to remove and replace it with a new one. To remove a damaged spoke, unscrew the nipple with your spoke wrench and carefully remove the spoke from the hub and rim. Replacement spokes can be obtained from bicycle shops or online retailers. Once you have the new spoke, thread it through the hub and rim, and securely tighten the nipple with your spoke wrench.
Finalizing the Truing Process
Testing the Wheel’s Alignment
After completing the truing process, it’s important to thoroughly test the wheel’s alignment. Take your bike for a short test ride on a smooth surface, paying close attention to any vibrations or instability. If you notice any issues, reevaluate the wheel’s alignment and make any necessary adjustments.
Ensuring Proper Wheel Tension
Proper wheel tension is crucial for maintaining a true wheel. Periodically check the spoke tension and ensure that all spokes are evenly tensioned. Use your spoke wrench to make small adjustments as needed to maintain consistent tension throughout the wheel.
Checking for Structural Damage
Lastly, it’s important to perform a final check for any structural damage. Inspect the wheel, rim, spokes, and hub for any signs of cracks, dents, or other abnormalities that may compromise the wheel’s integrity and alignment. If you notice any issues, consult with a professional bike mechanic for further guidance and repairs if necessary.
By following these comprehensive steps, you should be able to successfully true your bicycle wheel and restore it to proper alignment. Remember to take your time, make small adjustments, and be patient throughout the process. Truing a wheel can be a skill that improves with practice, so don’t be discouraged if it takes a few attempts to achieve a perfectly true wheel. Happy riding!