How Do I Replace A Broken Spoke On My Bicycle Wheel?
Are you a cyclist who has encountered the frustrating issue of a broken spoke on your bicycle wheel? Don’t worry, because we’ve got you covered! In this article, we will guide you through the step-by-step process of replacing a broken spoke on your bicycle wheel, empowering you to get back on the road with ease. Whether you’re an experienced cyclist or just starting out, our friendly instructions will help you tackle this common problem and ensure that your cycling adventures continue uninterrupted. So let’s get started on this journey of fixing your broken spoke and getting your bike back in perfect working order!
Preparation
Before you begin replacing a broken spoke on your bicycle wheel, it’s important to gather all the necessary tools. You will need a spoke wrench, a screwdriver, and a bike stand or some way to elevate your bike off the ground. Additionally, having a rag or some cleaning supplies on hand can be helpful in case you encounter any dirt or debris while working on your wheel.
Once you have your tools ready, the first step in the process is to inspect the wheel. Take a close look at the broken spoke and assess the overall condition of the wheel. Look for any other potential issues, such as loose spokes or damage to the rim. If you notice any additional problems, it’s essential to address them before replacing the broken spoke to ensure the overall health of your wheel.
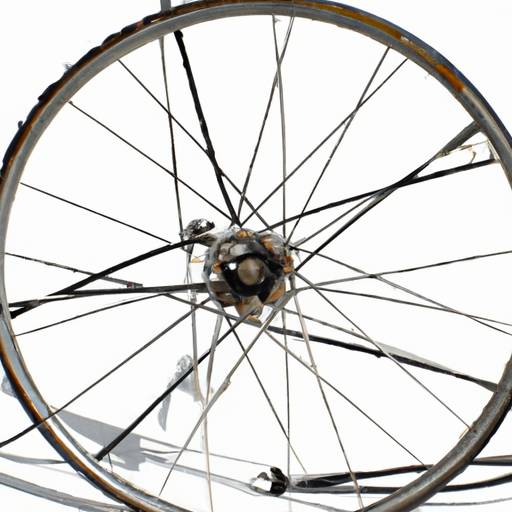
Next, count the spokes on your wheel. This step is important because it will help you determine the correct size and length of the replacement spoke you’ll need. By counting the spokes and taking note of their pattern, you can ensure that the new spoke matches the existing ones and fits securely in your wheel.
Removing the Broken Spoke
To remove the broken spoke from your wheel, you’ll need to loosen the nipple that connects it to the rim. Using your spoke wrench, turn the nipple counterclockwise to loosen it. Be careful not to overtighten or strip the nipple, as this can cause further damage.
Once the nipple is loosened, gently pull the broken spoke out of the wheel. Take care not to damage the surrounding spokes or the wheel itself during this process. It may be helpful to apply a small amount of lubricant or penetrating oil to the nipple before removing the spoke, as this can help ease the process.
Replacing the Spoke
Now that you’ve successfully removed the broken spoke, it’s time to replace it with a new one. It’s crucial to choose the correct spoke for your wheel to ensure a proper fit and avoid any potential issues down the line. Refer to the spoke count and pattern you noted earlier to find a replacement spoke that matches the others.
Thread the new spoke into the nipple, starting from the rim side of the wheel. Carefully guide the spoke through the appropriate holes in the rim, making sure it follows the same path as the surrounding spokes. Once the spoke is threaded correctly, use your spoke wrench to tighten the nipple. Avoid overtightening, as this can cause unnecessary stress on the wheel.
After tightening the nipple, you’ll need to align the spoke in the hub. Gently push the spoke towards the hub, making sure it sits evenly with the rest of the spokes. This alignment is crucial for maintaining proper tension and balance in the wheel.
Truing the Wheel
Once the new spoke is in place, it’s time to assess the overall condition of your wheel and make any necessary adjustments. Start by identifying any additional issues that may have been hidden by the broken spoke. Look for any wobbles or inconsistencies in the wheel’s alignment.
To adjust the spoke tension, use your spoke wrench to turn the nipple. If the wheel is leaning to one side, tighten the spokes on the opposite side to correct the imbalance. Similarly, if the wheel is wobbling, tighten the spokes on the side opposite the wobble to bring it back into alignment.
As you make adjustments, be sure to check the wheel’s alignment frequently. Spin the wheel and observe its movement, noting any areas that still require adjustment. This process may require some trial and error, so be patient and make small adjustments at a time until the wheel is properly trued.
Tightening the Spoke
Once the wheel is trued and aligned, it’s essential to ensure that the spokes are securely tightened. Using your spoke wrench, turn the nipple clockwise until it is tight. Be careful not to overtighten, as this can lead to spoke breakage or damage to the wheel.
Checking the Wheel
After completing the spoke replacement and truing process, it’s time to give your wheel a final check. Spin the wheel and observe its movement carefully. Ensure that it spins freely and smoothly without any wobbles or rubbing against the brake pads. Pay attention to any unusual noises or vibrations, as these can indicate further issues that may need to be addressed.
Ensure Proper Alignment and Tension
As you inspect the wheel, take note of its alignment and tension. Ensure that the wheel remains correctly trued and that the spoke tension is balanced throughout the wheel. If you notice any areas of concern, you may need to make further adjustments to achieve optimal performance.
Test Ride
The final step in replacing a broken spoke is taking your bike for a short test ride. This allows you to assess how well the wheel performs under normal riding conditions. Pay attention to how the wheel feels and any issues that may arise during the ride. If you notice any additional problems or concerns, it may be necessary to reevaluate the spoke replacement or seek further professional assistance.
Inspect the Wheel Again
After your test ride, take a moment to inspect the wheel once more. Check for any signs of stress or damage that may have been caused by the broken spoke replacement process. Ensure that everything remains properly aligned and that the spokes are securely tightened. If everything looks in order, you can rest assured knowing that your wheel is ready to go.
Preventing Future Issues
To prevent future spoke breakage and maintain the health of your wheel, it’s important to regularly check the spoke tension. Use your spoke wrench to test the tension of each spoke, making adjustments as necessary. This helps distribute the load evenly and reduces the risk of individual spokes breaking under stress.
Additionally, it’s essential to avoid excessive weight or impact on your wheel. Avoid riding over rough surfaces or large obstacles that could potentially damage the spokes or rim. By taking these preventative measures, you can prolong the lifespan of your wheel and minimize the need for future spoke replacements.
Seeking Professional Help
While replacing a broken spoke can often be done at home, sometimes it’s best to seek professional assistance. If you aren’t confident in your ability to perform the replacement or if you encounter any additional issues during the process, it’s always a good idea to consult with your local bike shop or a professional bike mechanic. They have the knowledge and expertise to address any complex problems and ensure that your wheel is in optimal condition.
Consult with Local Bike Shops
If you’re uncertain about the process or simply want peace of mind, don’t hesitate to reach out to your local bike shop. They can provide guidance, advice, and even perform the spoke replacement for you if desired. Bike shops have experienced mechanics who specialize in wheel maintenance and can ensure that the job is done correctly.
Consider Professional Assistance
For more complex issues or if you lack the necessary tools and expertise, professional assistance may be the best option. They can evaluate your wheel, identify any underlying issues, and perform the necessary repairs to get your wheel back in top shape. While this may come at a cost, it can save you time, effort, and potential headaches down the road.
Conclusion
Replacing a broken spoke on your bicycle wheel requires careful preparation, precise techniques, and attention to detail. By gathering the necessary tools, inspecting the wheel, and counting the spokes, you set the foundation for a successful spoke replacement. Through the process of removing the broken spoke, replacing it with the correct size and length, truing the wheel, tightening the spoke, and performing the necessary checks, you can ensure that your wheel is properly aligned and tensioned.
Remember to take a short test ride and inspect the wheel again to confirm its performance. To prevent future issues, regularly check the spoke tension, avoid excessive weight or impact, and seek professional help when needed. By following these steps, you’ll be able to maintain a reliable and safe wheel, keeping you rolling smoothly on your cycling adventures.


