How Do I Install And Set Up A Bike Computer Or GPS?
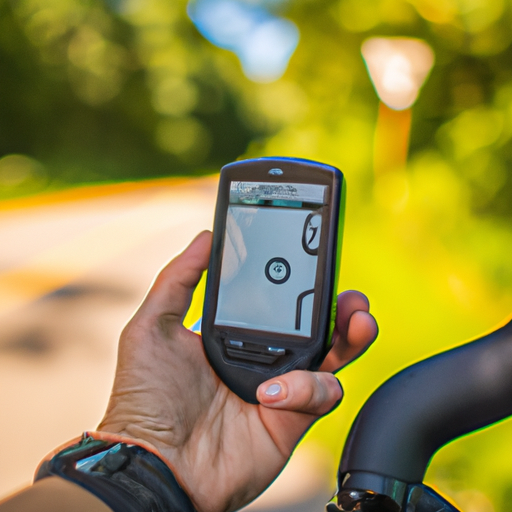
So you’ve just gotten yourself a bike computer or GPS and you’re excited to make the most out of your cycling experience. But now you might be wondering, “How do I install and set up this device?” Well, fret not! In this article, we will walk you through the process step by step, ensuring that you’ll be up and running in no time. Whether you’re a beginner or a seasoned cyclist, this guide will provide you with all the information you need to navigate the world of bike computers and GPS devices with ease.
Choose the Right Bike Computer or GPS
When it comes to choosing a bike computer or GPS, it’s important to consider your specific needs and budget. Think about what features are essential for your riding style and goals. Are you a casual rider who just wants to track your distance and speed? Or are you a serious cyclist who needs advanced features like heart rate monitoring and power meter integration? Determining your requirements will help narrow down your options and make the selection process easier. Additionally, consider your budget and look for devices that offer the best value for your money.
Research Different Options
Once you have identified your needs and budget, it’s time to research different bike computers or GPS devices available in the market. Look for reputable cycling brands that have a track record of producing reliable and high-quality products. Compare the specifications, features, and prices of different models to find the one that best suits your requirements. Reading online reviews and forums can also provide valuable insights into the user experience and reliability of different devices. Taking the time to research will ensure you make an informed decision.
Read Reviews and Ratings
Before making a final decision, be sure to read reviews and ratings of the bike computer or GPS models you are considering. Online retailers like Amazon often feature customer reviews, giving you an idea of the pros and cons of each device. Pay attention to the overall rating as well as specific feedback regarding performance, accuracy, ease of use, and durability. It’s also worth checking professional reviews from cycling publications or trusted technology blogs. By gathering information from various sources, you can get a comprehensive understanding of the strengths and weaknesses of each device.
Look for Essential Features
When choosing a bike computer or GPS, it’s crucial to look for essential features that are necessary for your cycling needs. Some key features to consider include GPS navigation, ANT+ or Bluetooth connectivity, speed and distance tracking, heart rate monitoring, and compatibility with other sensors and devices. Depending on your preferences, you may also want to consider features like mapping, turn-by-turn directions, training programs, and data analysis capabilities. Make a checklist of the features you cannot compromise on and ensure the device you choose meets those requirements.
Gather Necessary Tools and Accessories
Before you can install and set up your bike computer or GPS, you will need a few tools and accessories to ensure a smooth installation process. Here’s a list of the essentials:
Bike Computer or GPS Unit
Of course, you’ll need the bike computer or GPS unit itself. Make sure you have selected the model that best fits your needs.
Mounting Hardware
Most bike computers or GPS units come with their own mounting hardware, such as brackets, screws, or bands. Check the packaging to ensure you have all the necessary components.
Zip Ties or Straps
Zip ties or straps are often used to secure the mounting hardware to your bike’s handlebar. These are inexpensive and widely available at hardware stores or online.
Sensors (Optional)
If you want to track additional data such as speed, cadence, heart rate, or power, you may need to purchase additional sensors. These sensors typically come with their own mounting hardware and instructions for installation.
Smartphone or Computer (for initial setup)
Some bike computers or GPS devices require initial setup or configuration using a smartphone or computer. Make sure you have the necessary devices and any required apps or software already installed.
Prepare Your Bike
Before mounting your bike computer or GPS, it’s important to prepare your bike’s handlebar area. Follow these steps to ensure a clean and suitable mounting surface:
Clean the Handlebar Area
Use a mild cleaning solution and a cloth to clean the handlebar area. Remove any dirt, grease, or residue that may interfere with the mounting process. This will help ensure a secure and stable attachment.
Inspect the Handlebar Diameter
Measure the diameter of your bike’s handlebar to ensure compatibility with the mounting hardware. Most bike computers or GPS units are designed to fit standard handlebar sizes, but it’s always a good idea to double-check before installation.
Remove Existing Mounts or Accessories
If your bike already has mounts or accessories attached to the handlebar, remove them before mounting the bike computer or GPS. This will free up space and prevent any interference or overcrowding.
Check Cable Routing
Take a close look at the cable routing on your bike. Make sure there are no cables in a position that would obstruct the mounting of the bike computer or GPS. If necessary, re-route or adjust the cables for a clean and tidy setup.
Adjust Handlebar Angle (if necessary)
If the angle of your handlebar is not comfortable or suitable for your riding position, you may want to adjust it before mounting the bike computer or GPS. Consult your bike’s user manual or a professional bike mechanic for guidance on handlebar adjustments.
Mount the Bike Computer or GPS
Now that you have prepared your bike and gathered the necessary tools, it’s time to mount the bike computer or GPS. Follow these steps for a secure and reliable attachment:
Choose the Mounting Location
Select a suitable location on your bike’s handlebar for mounting the bike computer or GPS. Consider factors such as visibility, accessibility, and interference with other components. Most riders prefer mounting the device in a central position for easy viewing while riding.
Double-Check Compatibility and Fit
Ensure that the mounting hardware provided with your bike computer or GPS is compatible with your chosen mounting location. Check that the brackets, screws, or bands align properly and securely attach to the handlebar. A loose or unstable fit can lead to vibrations or accidental detachment during rides.
Secure the Mounting Hardware
Tightly secure the mounting hardware to your bike’s handlebar using the provided screws, bands, or brackets. Double-check that everything is firmly in place and there is no wobbling or movement when you gently tug on the device.
Attach the Bike Computer or GPS Unit
Carefully attach the bike computer or GPS unit to the mounting hardware according to the manufacturer’s instructions. Ensure that the device is facing the right way and is securely clipped or screwed into place. Give it a little shake to confirm that it is securely attached before moving on to the next step.
Connect Sensors (if applicable)
If you have additional sensors such as speed and cadence sensors, heart rate monitors, or power meters, you may want to connect them to your bike computer or GPS for more detailed data tracking. Follow these steps to connect sensors:
Choose Compatible Sensors
Ensure that the sensors you have chosen are compatible with your bike computer or GPS. Check the device’s specifications or consult the manufacturer’s website for information about supported sensors. Mismatched or incompatible sensors may result in inaccurate or missing data.
Install Speed and Cadence Sensor
Attach the speed and cadence sensor to your bike according to the manufacturer’s instructions. Most sensors attach to the rear chainstay or the crank arm using zip ties or straps. Make sure the sensors are aligned properly and securely fastened.
Install Heart Rate Monitor
If you have a heart rate monitor, put it on according to the manufacturer’s instructions. Most heart rate monitors are worn around the chest, and the strap should be snug but not too tight. Ensure that the heart rate monitor is connected securely and properly.
Install Power Meter (if applicable)
If you have a power meter, follow the specific instructions for installation provided by the manufacturer. The installation process will vary depending on the type and model of the power meter. Make sure it is properly attached and calibrated for accurate power readings.
Power On and Pair the Device
With your bike computer or GPS installed and sensors connected (if applicable), it’s time to power on the device and pair it with your sensors. Follow these steps for a successful pairing:
Install Batteries or Charge the Device
If your bike computer or GPS unit requires batteries, install them according to the manufacturer’s instructions. Alternatively, if the device has a rechargeable battery, connect it to a power source and charge it fully before use.
Turn on the Bike Computer or GPS Unit
Press the power button or follow the specific instructions to turn on your bike computer or GPS unit. Wait for it to boot up and reach the main screen or home menu. Some devices may require you to press and hold the power button for a few seconds to turn them on.
Navigate to the Settings Menu
Use the buttons, touch screen, or user interface on your bike computer or GPS unit to navigate to the settings menu. The settings menu is typically indicated by a gear or cogwheel icon. Consult the device’s user manual if you’re unsure how to access the settings menu.
Activate the Bluetooth or ANT+ Connection
Access the connectivity settings within the settings menu and activate the Bluetooth or ANT+ connection. This will enable the device to search for and establish a connection with your sensors.
Search and Pair with Sensors
Initiate a search for available sensors within the connectivity settings. The device will scan for nearby sensors and display a list of options. Select the appropriate sensors from the list and follow the on-screen instructions to complete the pairing process.
Configure the Device Settings
Once your bike computer or GPS unit is powered on and paired with your sensors, it’s time to configure the device settings to personalize your riding experience. Follow these steps to set up the device according to your preferences:
Set Date and Time
Navigate to the date and time settings within the settings menu and adjust them accordingly. Use the provided options or input the date and time manually. A correct date and time are essential for accurate data logging and tracking.
Configure Units of Measurement
Choose your preferred units of measurement for distance, speed, and other relevant metrics. Most devices offer options for metric (kilometers, kilometers per hour) or imperial (miles, miles per hour) units. Select the units that are familiar and comfortable for you.
Customize Display Layout
Explore the display customization options within the settings menu and adjust the layout according to your preferences. Most devices allow you to choose which data fields to display, their size, and their position on the screen. Experiment with different layouts to find the one that suits your needs best.
Personalize Rider Information
Enter your personal details, such as height, weight, and age, into the rider information settings. This information is used to calculate metrics like calorie expenditure and power-to-weight ratio. Accurate rider information will provide more precise data during your rides.
Enable/Disable Data Logging
Decide whether you want the device to log and save your ride data automatically. Some devices have the option to enable or disable data logging to conserve battery life or reduce storage capacity. Choose the setting that aligns with your preferences and needs.
Calibrate and Test the Bike Computer or GPS
Before you hit the road or trail, it’s important to calibrate and test your bike computer or GPS to ensure accurate readings and reliable performance. Follow these steps for calibration and testing:
Perform Calibration Procedures
If your bike computer or GPS unit requires calibration, follow the manufacturer’s instructions to complete the process. Calibrating the device ensures accurate measurements of speed, distance, and other metrics. Remember to recalibrate periodically to maintain accuracy.
Test GPS Signal Acquisition
If your device has GPS capabilities, it’s important to test the signal acquisition before your first ride. Take the device outside and give it a few minutes to acquire a strong GPS signal. This will ensure accurate tracking of your route and distance.
Calibrate Sensors (if necessary)
If you have speed and cadence sensors or a power meter, follow the specific instructions for calibration provided by the manufacturer. Proper calibration ensures accurate data recording and analysis. Consult your device’s user manual or the sensor manufacturer’s website for detailed calibration steps.
Verify Speed and Distance Accuracy
Take your bike for a short ride to verify the accuracy of the speed and distance readings on your bike computer or GPS. Compare the measurements displayed on the device with known distances or landmarks. If there is a significant discrepancy, consult the device’s troubleshooting guide or contact customer support for assistance.
Sync with Smartphone or Computer
To make the most of your bike computer or GPS and gain access to advanced features and data analysis, consider syncing the device with your smartphone or computer. Follow these steps to establish a connection:
Install Manufacturer’s App (if applicable)
If your device has a dedicated app provided by the manufacturer, download and install it on your smartphone. Check the device’s user manual or the manufacturer’s website for information about compatible apps.
Activate Wireless Syncing
Access the connectivity settings on your bike computer or GPS and activate the wireless syncing feature. This will enable the device to establish a connection with your smartphone or computer.
Connect the Device via Bluetooth or USB
Depending on the capabilities of your device and the syncing options, connect your bike computer or GPS to your smartphone or computer using Bluetooth or a USB cable. Follow the specific instructions provided by the manufacturer for a successful connection.
Transfer Settings and Firmware Updates
Once the connection is established between your device and smartphone or computer, you can transfer your customized settings, routes, and workouts. Additionally, check for any available firmware updates for your device and install them to ensure optimal performance and access to the latest features.
Test Ride and Fine-Tune
With everything set up and synced, it’s time to take your bike for a test ride and fine-tune the device settings to meet your preferences. Follow these steps to make the most of your bike computer or GPS:
Start a Test Ride
Plan a short test ride to familiarize yourself with the bike computer or GPS and its features. Start the device’s activity tracking or ride recording function before setting off. Pay attention to the display layout, data fields, and ease of accessing different functions while riding.
Monitor Real-Time Data
During your test ride, keep an eye on the real-time data displayed on your bike computer or GPS. Monitor metrics like speed, distance, time, heart rate, and any other data that is relevant to your cycling goals. Ensure that the data is accurate, easily accessible, and presented in a format that you find helpful.
Evaluate Accuracy and Reliability
Assess the accuracy and reliability of the data recorded during your test ride. Compare the readings from your bike computer or GPS with known measurements, such as mile markers or GPS routes. Look for any discrepancies or inconsistencies that may indicate a need for adjustment or troubleshooting.
Adjust Display Preferences
Based on your test ride experience, fine-tune the display preferences on your bike computer or GPS. Experiment with different data field layouts, font sizes, and color schemes to find the setup that suits your needs best. Customizing the display will ensure that the most relevant information is easily accessible at a glance.
Record and Analyze Data
Once your test ride is complete, save the recorded data on your bike computer or GPS. If your device is synced with a smartphone or computer, transfer the data for further analysis. Use the manufacturer’s app or third-party software to review your ride data, track progress, and identify areas for improvement. Analyzing the data will help you set goals, measure performance, and make informed decisions about your training and riding strategies.
Installing and setting up a bike computer or GPS may seem daunting at first, but by following the steps outlined in this guide, you can do it with ease. Remember to consider your needs and budget, research different options, and read reviews to make an informed decision. Gather the necessary tools and accessories, prepare your bike for installation, and mount the device securely. Connect any additional sensors, power on the device, and pair it with your sensors. Configure the device settings, calibrate and test its accuracy, and sync it with your smartphone or computer for advanced features. Finally, take it for a test ride, fine-tune the settings, and make the most of your biking experience with the invaluable data and insights provided by your new bike computer or GPS. Happy riding!


