How Do I Clean And Maintain My Bike’s Disc Brake Rotors?
So you’ve got yourself a shiny new bike with disc brake rotors, but now you’re wondering how to keep them in tip-top shape. Well, fret not, because in this article, we’ll guide you through the process of cleaning and maintaining your bike’s disc brake rotors. From the tools you’ll need to the step-by-step process, we’ve got you covered. With our help, you’ll soon be riding smoothly and confidently, knowing that your disc brake rotors are clean and well-maintained. So let’s dive right in and get started, shall we?
Cleaning and Maintaining Bike’s Disc Brake Rotors
Why is it important to clean and maintain disc brake rotors?
Keeping your bike’s disc brake rotors clean and well-maintained is essential for optimal performance and safety. Over time, dirt, grime, and debris can accumulate on the rotors, affecting their ability to grip the brake pads effectively. This can result in reduced braking power, longer stopping distances, and potential safety hazards. Regular cleaning and maintenance ensure that your disc brake rotors remain in top condition, allowing for consistent and reliable braking performance.
When should I clean and maintain disc brake rotors?
Cleaning and maintaining your bike’s disc brake rotors should be done on a regular basis, especially if you ride in muddy or wet conditions. Ideally, it is recommended to clean and inspect the disc brake rotors every 100-200 miles or at least once a month. Additionally, if you notice any decrease in braking performance or unusual noises when applying the brakes, it is a good indicator that your disc brake rotors need attention. By performing regular maintenance, you can prevent any potential issues before they escalate and ensure the longevity of your bike’s braking system.
What tools and materials do I need?
To clean and maintain your bike’s disc brake rotors, you will need the following tools and materials:
- A clean cloth or lint-free paper towels
- Isopropyl alcohol or brake cleaner spray
- Soft-bristle brush or toothbrush
- Brake pad spacer or business card (for removing the wheel and brake pads)
- Torque wrench (for adjusting the brakes and replacing the rotors)
- Replacement brake pads (if necessary)
- Rotor truing tool (for inspecting and aligning the rotors)
- Bicycle-specific lubricant or disc brake grease
Having these tools and materials readily available will make the process of cleaning and maintaining your disc brake rotors much easier and efficient.
Precautions to take before cleaning and maintaining disc brake rotors
Before starting the cleaning and maintenance process, it is essential to take certain precautions to ensure your safety and the proper functioning of your bike’s disc brake system.
- Remove any loose clothing or accessories that may get caught in the bicycle chain or brake rotors.
- Put on latex or disposable gloves to protect your hands from any chemicals or grease.
- Work in a well-ventilated area or outdoors to avoid inhaling any fumes from the cleaning agents.
- Carefully read and follow the instructions provided by the bike manufacturer regarding disc brake cleaning and maintenance.
- If you are not confident in performing the cleaning and maintenance yourself, it is recommended to take your bike to a professional bicycle mechanic for assistance.
By taking these precautions, you can ensure a safe and effective cleaning and maintenance process for your bike’s disc brake rotors.

Cleaning Disc Brake Rotors
Removing the wheel
To start the cleaning process, you will need to remove the wheel from your bike. This can be done by:
- Shift the gears to the smallest chainring and smallest rear cog to relieve tension on the chain.
- Engage the brakes to prevent the wheel from spinning.
- Loosen the quick-release lever or unscrew the axle nuts to release the wheel from the frame.
- Carefully remove the wheel, taking note of how it is positioned so that you can easily reinstall it later.
Removing the brake pads
Once the wheel is removed, you can proceed to remove the brake pads. This will allow better access to the disc brake rotor for cleaning. Follow these steps:
- Insert a brake pad spacer or a business card between the brake pads to prevent them from closing when the rotor is removed.
- Gently squeeze the brake lever to move the brake pads away from the rotor.
- Slide out the retaining pin or retaining bolt that secures the brake pads in place.
- Carefully remove the brake pads, taking note of their orientation for proper reinstallation later.
Inspecting the brake pads
With the brake pads removed, it is a good opportunity to inspect their condition. Look for signs of wear, such as uneven or thinning surfaces. If the brake pads are significantly worn or damaged, it is recommended to replace them with new ones. Additionally, ensure that the brake pad surfaces are clean and free from any debris that may have accumulated.
Cleaning the brake pads
To clean the brake pads, follow these steps:
- Pour a small amount of isopropyl alcohol or brake cleaner spray onto a clean cloth or lint-free paper towel.
- Gently scrub the brake pad surfaces with the cloth or towel to remove any dirt, oil, or debris.
- Inspect the cloth for any residue or contaminants, and repeat the cleaning process if necessary.
- Once the brake pads are clean, set them aside on a clean surface to dry completely before reinstalling them.
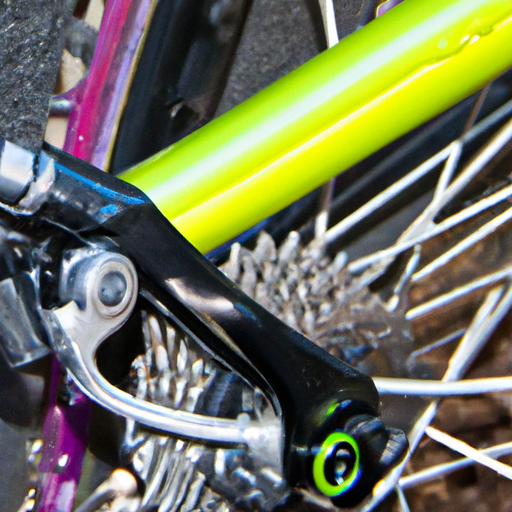
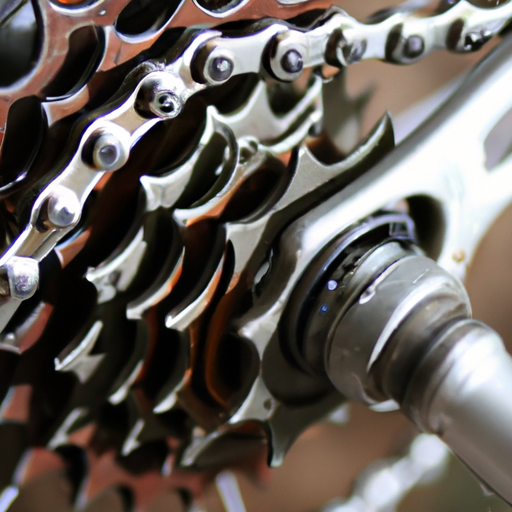
Cleaning the rotor
After removing the brake pads, it’s time to clean the disc brake rotor. Follow these steps:
- Spray a small amount of isopropyl alcohol or brake cleaner spray directly onto the rotor surface.
- Use a soft-bristle brush or toothbrush to gently scrub the rotor, paying close attention to the areas in between the rotor’s fins.
- Ensure that all surfaces of the rotor are thoroughly cleaned and free from any dirt or contaminants.
- Wipe the rotor dry with a clean cloth or lint-free paper towel.
- Take extra care not to touch the cleaned rotor surface with your bare hands to avoid transferring any oils or grease onto it.
By following these steps, you can effectively clean your bike’s disc brake rotors, removing any dirt or debris that may hinder their performance.

Maintaining Disc Brake Rotors
Checking for brake pad wear
Regularly checking the wear of your brake pads is an essential part of maintaining your bike’s disc brake rotors. Follow these steps to ensure optimal brake pad wear:
- Inspect the brake pad surfaces for any visible signs of wear. Look for thinning or uneven surfaces.
- Measure the remaining thickness of the brake pads using a caliper or ruler.
- Compare the thickness to the recommended minimum thickness stated by the brake pad manufacturer.
- If the brake pads are worn beyond the recommended thickness, it is time to replace them with new ones. Replacing worn brake pads ensures maximum braking performance and prevents damage to the disc brake rotors.
Adjusting the brakes
Maintaining proper brake adjustment is crucial for optimal braking performance. To adjust your bike’s disc brakes, follow these steps:
- Engage the brake lever to check for any excessive play or lack of responsiveness.
- If the brake lever feels spongy or requires excessive force to engage, you may need to adjust the brake caliper.
- Locate the brake caliper adjustment screws or hex bolts on the caliper body.
- Use a torque wrench to loosen or tighten the adjustment screws or hex bolts as needed to achieve the desired brake lever feel.
- Test the brake lever to ensure that the brakes engage smoothly and effectively without any unusual noises or resistance.
Inspecting the rotors
Regularly inspecting the condition of your bike’s disc brake rotors is essential for maintaining their performance. Follow these steps to inspect the rotors:
- Visually inspect the rotor surfaces for any visible signs of damage, such as deep scratches or warping.
- Ensure that the rotor surfaces are smooth and free from any contaminants that may affect braking performance.
- Use a rotor truing tool, if available, to check for any misalignment or warping of the rotor. Adjust or replace the rotor if necessary.
- If the rotor shows significant signs of damage or wear, it may be time to replace it with a new one.
Replacing the rotors
Replacing the disc brake rotors is necessary when they are severely worn, damaged or no longer perform optimally. Follow these steps to replace the rotors:
- Begin by removing the wheel and brake pads as mentioned earlier.
- Use a torque wrench to remove the bolts securing the rotor to the hub.
- Carefully slide the old rotor off the hub and set it aside.
- Position the new rotor onto the hub, aligning the mounting holes with the holes on the hub.
- Secure the new rotor in place by tightening the bolts to the recommended torque settings provided by the rotor manufacturer.
- Reinstall the brake pads and wheel, making sure to follow proper installation techniques.
Replacing worn or damaged rotors ensures the continued performance of your bike’s disc brake system and enhances overall safety during rides.
Lubricating the brake system
To ensure smooth and efficient operation of your bike’s disc brake system, it is essential to lubricate certain components. Follow these steps to lubricate the brake system:
- Apply a small amount of bicycle-specific lubricant or disc brake grease to the moving parts of the brake caliper, such as the pivot points and springs.
- Use a clean cloth or paper towel to wipe off any excess lubricant after applying. Avoid getting lubricant on the brake pad or rotor surfaces, as it can decrease braking performance.
By performing regular maintenance tasks like lubrication, you can preserve the longevity of your bike’s disc brake system and enhance its overall performance.
In conclusion, cleaning and maintaining your bike’s disc brake rotors is vital for optimal performance and safety. Regular cleaning, inspection, and proper adjustment of the brake pads and rotors ensure reliable and consistent braking. By following the steps outlined in this article, you can effectively clean and maintain your bike’s disc brake rotors, enhancing your overall riding experience. Remember to practice precaution and consult a professional bicycle mechanic for assistance if needed. Happy riding!