How Do I Adjust The Gears On My Bike That Are Not Shifting Smoothly?
Are you tired of struggling with your bike’s gears that just won’t shift smoothly? Well, fret no more! In this article, we will guide you through the step-by-step process of adjusting the gears on your bike, ensuring a seamless and comfortable ride every time. From identifying the problem to making the necessary adjustments, we’ve got you covered. So, grab your bike and let’s get those gears shifting smoothly in no time!
Identify the Problem
Check for misaligned derailleur
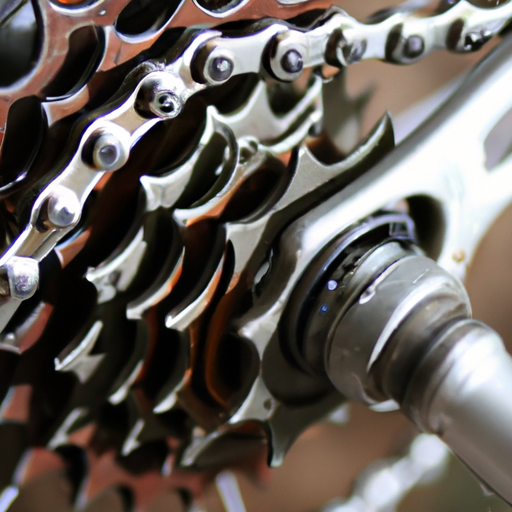
If your bike is not shifting smoothly, one of the first things to check is the derailleur alignment. The derailleur is responsible for moving the chain from one gear to another. A misaligned derailleur can cause the chain to rub against the derailleur or skip gears altogether. To check the alignment, stand behind your bike and look at the derailleur from the rear. It should be parallel to the cassette and the chain should run straight through the jockey wheels. If it looks off, it may need to be adjusted.
Inspect the shift cables and housing
Another common cause of poor shifting is worn or damaged shift cables and housing. These components connect the gear shifter to the derailleur and can stretch or fray over time. Inspect the cables and housing for any signs of wear such as rust, fraying, or kinks. If you notice any damage, it’s time to replace them.
Determine if the chain is worn or dirty
Lastly, a worn or dirty chain can cause shifting issues. Over time, chains can become stretched or accumulate dirt and grime, which can affect how smoothly they move across the gears. To determine if your chain is worn, you can use a chain wear tool, which measures the length of the chain. If it exceeds the recommended limit, it’s time for a replacement. Additionally, if your chain is dirty, it’s important to clean and lubricate it regularly to ensure optimal performance.
Adjusting the Derailleur
Set the derailleur to the correct position
To adjust the derailleur, start by shifting the chain onto the smallest chainring and the smallest rear cog. This will relieve tension on the derailleur and make adjustments easier. Then, locate the barrel adjuster on the rear derailleur. Turning it counterclockwise will move the derailleur towards the spokes, while turning it clockwise will move the derailleur away from the spokes. Adjust the barrel adjuster until the jockey wheels are aligned with the smallest rear cog.
Fine-tune the derailleur’s alignment
Once the derailleur is in the correct position, it’s time to fine-tune the alignment. Shift through the gears, paying close attention to how smoothly the chain moves. If it’s not shifting smoothly, you may need to make additional adjustments. Use the barrel adjuster to fine-tune the alignment, making small adjustments after each shift to find the optimal position.
Check the limit screws
The limit screws on the derailleur limit how far it can move towards the inside (low limit screw) and outside (high limit screw) of the cassette. If your bike is having trouble shifting into the smallest or largest cog, the limit screws may need adjusting. Using a screwdriver, turn the appropriate limit screw until the derailleur lines up with the smallest and largest cogs without rubbing on them.
Replacing Shift Cables and Housing
Remove the old cables and housing
If your shift cables and housing are worn or damaged, it’s important to replace them. Start by shifting the chain onto the smallest chainring and rear cog to relieve tension on the cables. Then, use a cable cutter or a sharp pair of scissors to cut the cable near the derailleur and at the shifter. Next, remove the cable housing by loosening any securing bolts or clamps. Carefully remove the old cables and housing from the bike.
Install new shift cables and housing
Before installing the new shift cables and housing, ensure they are the correct length for your bike. Begin by inserting the new cable housing into any cable stops or holders along the frame. Next, thread the new cable through the housing and attach it to the derailleur. Make sure the cable is properly seated in the derailleur’s cable anchor bolt. Then, thread the cable through the housing on the handlebars and secure it in the shifter.
Adjust cable tension
Once the new shift cables and housing are installed, it’s important to adjust the cable tension. Start by shifting the chain onto the smallest chainring and rear cog to relieve tension on the cables. Then, use the barrel adjuster on the derailleur to fine-tune the tension. Turn the adjuster counterclockwise to increase tension and clockwise to decrease tension. Test the shifting after each adjustment to ensure smooth, precise gear changes.
Cleaning and Lubricating the Chain
Clean the chain
A dirty chain can cause friction and lead to poor shifting. To clean the chain, you’ll need a chain cleaning tool, a degreaser, and a brush. Start by applying the degreaser to the chain and scrubbing it with the brush to remove any dirt and grime. Pay special attention to the areas between the chain links. Once the chain is clean, rinse it thoroughly with water to remove any excess degreaser.
Apply lubricant to the chain
After cleaning the chain, it’s important to reapply lubricant to ensure smooth operation. Choose a bicycle-specific chain lubricant and apply a small amount to each link of the chain. Turn the pedals backward to help distribute the lubricant evenly. Be careful not to apply too much, as excess lubricant can attract dirt and debris.
Wipe off excess lubricant
After applying the lubricant, use a clean rag to wipe off any excess. This will help prevent the chain from attracting dirt and keep your drivetrain clean. Ensure the chain is dry before moving on to the next step.
Checking Chain Wear
Use a chain wear tool
To determine if your chain is worn, you can use a chain wear tool. This tool measures the length of the chain and can indicate if it has stretched beyond the recommended limit. Simply insert the tool into a section of the chain and read the measurement. If it exceeds the recommended limit, it’s time to replace the chain.
Replace the chain if necessary
If the chain wear tool indicates that your chain is worn, it’s important to replace it. A stretched chain can cause premature wear on the cassette and chainrings, leading to a poor shifting performance. Use a chain breaker tool to remove the old chain and install a new one according to the manufacturer’s instructions.
Inspect the cassette and chainrings
While checking the chain wear, take the opportunity to inspect the cassette and chainrings for any signs of wear or damage. Look for worn or sharp teeth, which can affect shifting performance. If you notice any issues, it may be necessary to replace the cassette or chainrings to ensure smooth gear changes.
Examining the Gear Shifter
Inspect the gear shifter for damage
If your gears are not shifting smoothly, it’s important to inspect the gear shifter for any damage. Look for signs of wear, such as cracked or broken parts. Check the shifter paddles to ensure they are engaging properly and that there is no excessive play or stiffness.
Clean and lubricate the gear shifter
Dirt and grime can build up inside the gear shifter, affecting its performance. To clean the gear shifter, use a degreaser and a clean rag. Apply the degreaser to a cloth and carefully wipe down the shifter, paying attention to all the moving parts. After cleaning, apply a small amount of lubricant to the shifter mechanism to ensure smooth operation.
Check for worn or broken parts
During the inspection, check for any worn or broken parts in the gear shifter. Look for loose or damaged cables, worn-out springs, or any other signs of wear. If you notice any issues, it may be necessary to replace these parts to restore proper shifting functionality.
Inspecting the Rear Derailleur Hanger
Check the condition of the derailleur hanger
The derailleur hanger is a small piece of metal that attaches the rear derailleur to the bike frame. It’s important to check the condition of the derailleur hanger as a bent or damaged hanger can affect shifting performance. Look for any signs of bending, cracks, or other damage. If you notice any issues, it may be necessary to replace the derailleur hanger.
Align or replace the derailleur hanger if necessary
If the derailleur hanger is bent or misaligned, it’s important to carefully realign it. This can be done using a derailleur hanger alignment tool or by seeking assistance from a professional bike shop. Proper alignment will ensure the smooth movement of the derailleur and improve shifting performance. If the hanger is beyond repair, it may need to be replaced.
Ensure the derailleur is properly mounted
After realigning or replacing the derailleur hanger, make sure the derailleur is mounted securely. Check that all bolts are tightened to the manufacturer’s specifications. A loose derailleur can cause poor shifting and potentially damage other components.
Adjusting Cable Tension
Locate the barrel adjuster
The barrel adjuster is a small cylindrical component typically located on the rear derailleur or the gear shifter. It can be used to fine-tune the cable tension, which is crucial for smooth shifting. Locate the barrel adjuster and familiarize yourself with its operation.
Make small adjustments to the cable tension
To adjust the cable tension, shift the bike onto the smallest chainring and the smallest rear cog. Then, turn the barrel adjuster counterclockwise to increase tension or clockwise to decrease tension. Make small adjustments and test the shifting after each adjustment to find the optimal tension for smooth and precise gear changes.
Test shifting after each adjustment
After making adjustments to the cable tension, it’s important to test the shifting to ensure it’s smooth and accurate. Shift through the gears multiple times, paying attention to how the chain moves across the cassette. If the shifting is still not satisfactory, continue making small adjustments until you achieve the desired performance.
Updating the Chainrings or Cassette
Replace worn or damaged chainrings
If your bike’s gears are not shifting smoothly, worn or damaged chainrings could be the culprit. Inspect the chainrings for any signs of excessive wear or bent teeth. If you notice any issues, it may be necessary to replace the chainrings. Consult the manufacturer’s specifications for compatibility and installation instructions.
Install a new cassette if necessary
Similar to chainrings, a worn or damaged cassette can cause poor shifting. Inspect the cassette for any worn or bent teeth. If necessary, remove the old cassette using a cassette removal tool and install a new one. Consult the manufacturer’s specifications for correct installation and to ensure compatibility with your bike’s drivetrain.
Ensure compatibility with your bike’s drivetrain
When replacing chainrings or cassettes, it’s important to ensure compatibility with your bike’s drivetrain. Different bikes have different gear configurations, such as the number of gears and the spacing between them. Refer to your bike’s user manual or consult a professional to ensure you are choosing the correct components.
Consulting a Professional
Seek assistance from a bike shop
If you’ve followed all the previous steps and still experience issues with your bike’s shifting, it may be time to seek assistance from a professional bike shop. Experienced technicians can diagnose and address more complex issues, ensuring your bike performs at its best.
Consider getting a bike fitting
A bike fitting can also help improve shifting performance. A professional bike fitter will assess your riding position, including saddle height, handlebar reach, and pedal alignment. Correcting any misalignments or discomfort can optimize your power transfer and improve your overall riding experience.
Ask for recommendations and advice
Don’t hesitate to ask for recommendations and advice from fellow cyclists or bike experts. Online forums, cycling clubs, and social media groups can be great resources for finding tips and solutions to common shifting problems. Sharing experiences and seeking guidance from others can often lead to valuable insights and solutions. Remember, everyone has dealt with shifting issues at some point, so don’t be afraid to ask for help.
By following these steps, you can diagnose and address common shifting issues on your bike. Whether it’s a simple adjustment, replacing worn components, or seeking professional assistance, taking the time to optimize your bike’s shifting will lead to a smoother, more enjoyable ride. Happy pedaling!


