
How Do I Adjust My Bike’s Handlebar And Stem For A Better Riding Position?
Adjusting the handlebar and stem of your bike can greatly enhance your riding experience by ensuring a comfortable and efficient riding position. Whether you’re a seasoned rider or just starting out, understanding how to properly adjust these components is essential. By making simple adjustments, you can customize your bike’s handlebar and stem to match your body’s individual needs, allowing for a more enjoyable and effective ride. In this article, we will guide you through the process of adjusting your bike’s handlebar and stem, providing you with the knowledge and tools necessary to achieve the perfect riding position.
Choosing the Right Handlebar and Stem for Your Riding Style
When it comes to adjusting your bike’s handlebar and stem for a better riding position, the first step is to understand the different types of handlebars that are available. There are several popular options to choose from, each with its own unique characteristics and intended use.
Some common types of handlebars include drop bars, flat bars, riser bars, and aero bars. Drop bars, often found on road bikes, provide a more aerodynamic riding position by allowing you to lean forward and reduce wind resistance. Flat bars, on the other hand, offer a more upright riding position and are commonly found on mountain bikes and hybrid bikes. Riser bars provide an even more upright position for riders who prefer a more comfortable and relaxed riding experience. Aero bars are typically used by competitive cyclists and triathletes to further reduce air resistance.
Considerations When Choosing Handlebar Width
Once you have determined the type of handlebar that suits your riding style, the next step is to consider the appropriate handlebar width. The width of your handlebar can have a significant impact on your overall comfort and control while riding.
To determine the right handlebar width for you, it’s important to consider your body proportions, shoulder width, and riding preferences. Generally, a wider handlebar will provide better stability and control, especially when navigating technical terrain or during high-speed descents. However, a handlebar that is too wide can lead to discomfort or inefficient biomechanics, particularly if it causes your arms to excessively flare out.
Determining the Right Stem Length
In addition to choosing the right handlebar, it’s crucial to consider the proper stem length for your riding style and body proportions. The stem is the component that connects the handlebar to the steerer tube of your bike’s fork.
The stem length determines the reach and overall position of your upper body while riding. A longer stem will position you in a more stretched-out and aerodynamic position, while a shorter stem will provide a more upright riding posture. It’s important to strike the right balance between comfort, aerodynamics, and bike handling based on your individual needs.
Understanding Different Stem Angles
Stem angles also play a role in your bike’s overall handling and riding position. The stem angle refers to the angle at which the stem rises above or drops below the horizontal plane. Common stem angles include positive (+) angles, which rise above the horizontal plane, and negative (-) angles, which drop below it.
Selecting the appropriate stem angle depends on your desired riding position and the type of handlebar you are using. Experimenting with different stem angles can help fine-tune your bike’s handling characteristics and improve personal comfort.
Considering Handlebar Rise or Drop
Handlebar rise or drop is another factor to consider when adjusting your bike’s handlebar and stem for a better riding position. This refers to the vertical distance between the handlebar and the stem clamp area. Some handlebars have a flat or zero-rise design, while others have a rise, creating a more ergonomic grip position.
If you prefer a more upright riding position, a handlebar with a significant rise can help achieve this. Alternatively, a flat or low-rise handlebar may be more suitable for riders seeking a more aerodynamic position or better maneuverability on technical terrain.
Evaluating Your Current Riding Position
Before making any adjustments to your bike’s handlebar and stem, it’s important to evaluate your current riding position. Take note of any discomfort or efficiency issues you may be experiencing, as they can provide valuable insights into what adjustments may be necessary.
Assessing Your Current Comfort and Efficiency
Consider how comfortable you feel while riding. Do you experience any numbness or tingling in your hands, wrists, or arms? Do you feel any strain in your neck, shoulders, or lower back? Evaluating your current comfort level can help identify areas that need adjustment.
Efficiency is also crucial when it comes to riding position. Are you able to generate power efficiently without feeling like you’re wasting energy? Does your current riding position allow for smooth pedaling and optimal transfer of energy to the pedals? Taking stock of your efficiency can guide you in finding the right adjustments to enhance your riding experience.
Identifying Any Issues or Discomforts
During your evaluation, pay close attention to any specific issues or discomforts you may be experiencing while riding. These can range from discomfort in the hands or wrists to pain in the neck or lower back. Identifying these problems will help determine which adjustments need to be made to alleviate them.
Remember, everyone’s body is unique, so it’s essential to listen to your own comfort and make adjustments accordingly. What works for one person may not work for another, so don’t be afraid to experiment and find what feels best for you.
Adjusting the Handlebar Height
Once you have evaluated your riding position, you can begin making adjustments to your bike’s handlebar and stem. One of the first things to consider is the handlebar height. The ideal handlebar height depends on your riding style, comfort preferences, and the type of bike you have.
Determining the Ideal Handlebar Height
To begin adjusting the handlebar height, start by loosening the bolts on the stem clamp. This will allow you to move the handlebar up or down. Gradually make small adjustments until you find a height that feels comfortable and provides adequate control.
Raising or Lowering the Handlebar Position
If you prefer a more upright riding position, you may choose to raise the handlebar. This increases the height and allows you to maintain a more comfortable and less aggressive posture while riding. On the other hand, lowering the handlebar can create a more aerodynamic position, ideal for speed and efficiency.
When making these adjustments, be sure to maintain the correct torque on the bolts to ensure a secure fit. It’s always a good idea to consult your bike’s manufacturer guidelines to ensure proper torque specifications.
Adjusting the Handlebar Reach
In addition to adjusting the handlebar height, fine-tuning the handlebar reach is essential for achieving an optimal riding position. The handlebar reach refers to the horizontal distance between the saddle and the handlebar grips.
Understanding Handlebar Reach
The handlebar reach can significantly impact your comfort and control while riding. If the reach is too short, you may experience discomfort in your lower back or neck. Conversely, if the reach is too long, you may feel unstable or struggle to maintain control of the bike.
Adjusting the Stem Length
To adjust the handlebar reach, you can consider changing the stem length. A shorter stem will reduce the reach, bringing the handlebar closer to you. Conversely, a longer stem will increase the reach, lengthening the distance between you and the handlebar.
As with handlebar height adjustments, it’s important to make these changes gradually and test the new reach to ensure a comfortable riding position. Remember, finding the right balance between comfort, control, and bike handling is key.
Aligning the Handlebar
Proper alignment of the handlebar is crucial for maintaining stability and control while riding. Misaligned handlebars can lead to steering issues, decreased control, and potential accidents. Therefore, it’s important to regularly check and adjust the handlebar alignment.
Checking Handlebar Alignment
To check the alignment of your handlebar, stand in front of your bike and look down the centerline of the front wheel. The handlebar should be parallel to the wheel and centered between the fork blades. If you notice any misalignment, adjustments are necessary.
Adjusting Handlebar Alignment
To realign the handlebar, loosen the bolts on the stem clamp and rotate the handlebar until it is parallel to the front wheel. Once aligned, retighten the bolts, ensuring proper torque to secure the handlebar in place.
Fine-tuning the Handlebar Angle
The handlebar angle can greatly affect your riding comfort and control. Adjusting the handlebar angle allows you to find the optimal hand position and wrist alignment for a more comfortable and efficient ride.
Understanding Handlebar Angle
The handlebar angle refers to the rotation of the handlebar in relation to the stem clamp. A neutral handlebar angle is typically parallel to the ground, but individual preferences may vary.
Adjusting Handlebar Angle
To adjust the handlebar angle, loosen the bolts on the stem clamp and rotate the handlebar to your desired position. Experiment with different angles to find the one that provides the most comfort and control for your riding style.
Using Spacers to Fine-tune the Height and Reach
Spacers can be a valuable tool for fine-tuning both the handlebar height and reach. Spacers are stackable rings that sit on top of the stem, allowing you to raise or lower the handlebar position.
Adding or Removing Spacers
To adjust the handlebar height using spacers, simply remove or add spacers between the stem and the headset. Removing spacers will lower the handlebar position, while adding spacers will raise it. This can be an effective way to make small incremental adjustments to your riding position.
Effect on Bike Handling and Steering
It’s important to note that changing the height and reach of the handlebar using spacers can also have an impact on your bike’s handling and steering. Lowering the handlebar can result in a more responsive and agile feel, while raising it can provide more stability but sacrifice nimbleness. Consider these factors when deciding to add or remove spacers.
Adjusting the Handlebar Rotation
The rotation of the handlebar can also be adjusted to achieve a more comfortable and ergonomic grip position. Handlebar rotation allows you to fine-tune the position of the brake levers, shifters, and grips to suit your individual preferences.
Understanding Handlebar Rotation
To adjust the handlebar rotation, loosen the bolts on the stem clamp and rotate the handlebar in either direction. This will allow you to align the brake levers and shifters to the desired position, ensuring easy and comfortable access while riding.
Adjusting Handlebar Rotation
Experiment with different handlebar rotation angles to find the one that provides the most natural and comfortable grip position for your hands. Once you have found the optimal rotation, tighten the bolts on the stem clamp to secure the handlebar in place.
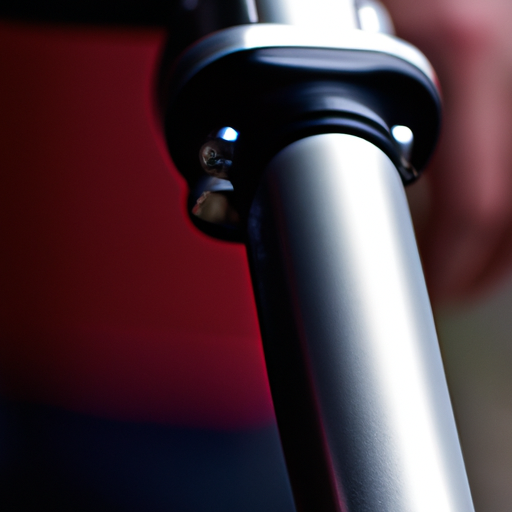
Tightening and Securing the Handlebar and Stem
Once you have made all the necessary adjustments to your bike’s handlebar and stem, it’s crucial to ensure that everything is properly tightened and secured. Loose bolts can lead to unwanted movement, compromised control, and potential safety hazards.
Properly Torquing the Bolts
Refer to your bike’s manufacturer guidelines for the recommended torque specifications for the stem and handlebar bolts. Using a torque wrench, tighten each bolt to the specified torque to guarantee a secure and safe fit.
Using a Torque Wrench
A torque wrench is a specialized tool that allows you to apply an exact amount of force when tightening bolts. It helps prevent over-tightening, which can cause damage, as well as under-tightening, which can lead to parts coming loose.
Checking for Secure Fit
After tightening all the bolts, give your bike a thorough shake and test the stability of the handlebar and stem. Ensure that there is no unwanted movement or flexing. If you notice any issues, recheck the torque on the bolts and make any necessary adjustments.
Seeking Professional Help if Needed
While adjusting your bike’s handlebar and stem can greatly improve your riding position, it’s important to note that bike fit is a complex process. If you’re experiencing ongoing discomfort, pain, or struggling to find the right riding position, it may be beneficial to consult a bike fit specialist.
When to Consult a Bike Fit Specialist
A bike fit specialist can provide a comprehensive analysis of your riding position, body proportions, and specific needs. They can make precise adjustments and recommendations based on their expertise and experience, ensuring that you achieve the optimal fit and comfort on your bike.
Considering Professional Bike Fitting Services
Professional bike fitting services are available at many bike shops and specialized bike fitting clinics. These services typically involve an in-depth assessment of your body’s anthropometric measurements, flexibility, and more. The specialist may use advanced tools and technologies, such as motion capture systems, pressure mapping, and 3D motion analysis, to make precise adjustments based on your unique requirements.
Remember, a properly adjusted bike can enhance your riding experience, promote comfort and efficiency, and reduce the risk of potential injuries. Investing time and effort into adjusting your bike’s handlebar and stem can bring significant benefits in terms of overall comfort and performance on the road or trail.