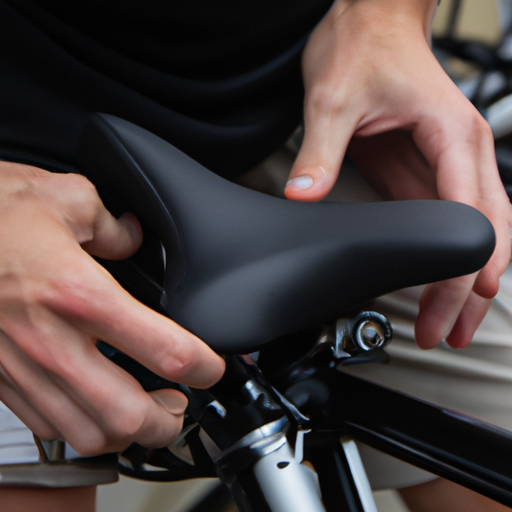
How Do I Install Handlebar Grips On My Mountain Bike?
So, you’ve got yourself a shiny new mountain bike and you’re ready to hit the trails. But wait, there’s one small detail you need to take care of before you start your adventure – installing the handlebar grips. Don’t worry, it’s not as daunting as it sounds. In this article, we’ll walk you through the steps on how to properly install handlebar grips on your mountain bike, ensuring a comfortable and secure grip as you navigate the rough terrains. Get ready to conquer those trails with confidence!
Gathering the Necessary Tools
Before you begin installing handlebar grips on your mountain bike, it’s important to gather all the necessary tools. Having everything prepared ahead of time will make the installation process much smoother and easier.
Choosing the Right Grips
The first tool you need to consider is the actual handlebar grips. There are various types of grips available in the market, each with its own unique features and benefits. When choosing grips, you should consider factors such as comfort, grip material, and style. It’s important to find grips that suit your personal preferences and riding style.
Tools Needed for Installation
In addition to the handlebar grips, there are a few other tools you will need for the installation process. These tools include a hex key or Allen wrench, grip glue or spray, a lubricant such as rubbing alcohol, scissors or a knife for trimming the excess grip, and bar end plugs to add a finishing touch. Make sure to have all these tools ready before you begin the installation process.
Removing the Old Grips
If you already have grips on your mountain bike’s handlebars, you will need to remove them before installing the new ones. Here’s how you can go about removing the old grips.
Loosening the Grips
Start by loosening the old grips from the handlebars. You can do this by using your hands to twist and turn the grips, gradually loosening their grip on the handlebars. If the grips are particularly stubborn, you can use a flathead screwdriver or similar tool to pry them off gently. Be careful not to damage the handlebars while doing this.
Removing the Grips
Once the grips are sufficiently loosened, you can slide them off the handlebars. Pull the grips towards you, taking care to apply even pressure and avoid any sudden movements. If necessary, you can use some soapy water or a mild cleaning solution to lubricate the grips and make the removal process easier. Once the grips are off, set them aside for disposal or potential reuse.

Preparing the Handlebars
Now that the old grips are removed, it’s time to prepare the handlebars for the installation of the new grips. This step involves cleaning the handlebars and applying grip glue or spray to ensure a secure and long-lasting fit.
Cleaning the Handlebars
Before you install the new grips, it’s crucial to clean the handlebars thoroughly. Use a mild soap and water solution or a specialized handlebar cleaner to remove any dirt, grease, or residue on the handlebars. This step is essential for ensuring proper adhesion of the new grips and preventing any slipping or movement once installed. Make sure to dry the handlebars completely before moving on to the next step.
Applying Grip Glue or Spray
To provide a secure grip and prevent the new grips from slipping during rides, you’ll need to apply grip glue or spray to the handlebars. Follow the instructions on the product carefully to apply the glue or spray evenly along the handlebars. Be cautious not to apply too much, as excess glue or spray can make it difficult to slide the grips into position. Allow the glue or spray to dry according to the manufacturer’s recommendations before proceeding to the next step.
Installing the New Grips
With the handlebars prepared and ready, it’s time to install the new grips. This step involves applying lubricant to facilitate the installation process and ensuring proper alignment of the grips.
Applying Lubricant
Before sliding the new grips onto the handlebars, it’s a good idea to apply some lubricant. This can be done using a lubricant such as rubbing alcohol or soapy water. Apply a small amount of the lubricant to the inside of the grips and the handlebars to allow for easier sliding. The lubricant will evaporate once the grips are in place, leaving a secure and tight fit.
Aligning the Grip
Once you’ve applied the lubricant, it’s time to align the grip with the handlebars. Start by positioning the grip at the end of the handlebars and slowly slide it into place. As you slide the grip, make sure it aligns evenly with the handlebars and maintains the desired angle and position. Take your time to ensure a proper fit, as correct alignment will contribute to a comfortable and effective grip during rides.

Securing the Grips
After the new grips are in place, it’s essential to secure them firmly on the handlebars. This step ensures that the grips do not slip or rotate during rides, providing you with a stable and reliable grip.
Pushing the Grip onto the Handlebar
To secure the grip, push it firmly onto the handlebar, starting from the end and working your way towards the center. Be cautious not to use excessive force that could damage the grip or handlebars. Apply even pressure as you push the grip, ensuring that it sits snugly on the handlebars without any gaps or spaces.
Checking Alignment
Once the grip is fully installed, double-check the alignment to ensure it is straight and in the desired position. Adjust the grip if necessary, making sure it aligns perfectly with the handlebars. Proper alignment not only adds to the aesthetics of your bike but also contributes to optimal grip and control while riding.
Adding Finishing Touches
Now that the grips are securely in place, you can add some finishing touches to complete the installation and enhance the overall look of your mountain bike.
Trimming the Excess Grip
If the newly installed grips extend beyond the handlebars, you can trim the excess grip to achieve a neat and professional appearance. Use a pair of scissors or a knife to carefully trim the excess grip, making sure to leave a small allowance for any future adjustments. Take your time and be mindful of your fingers while trimming the grip.
Adding Bar End Plugs
To further enhance the aesthetics and functionality of your mountain bike’s handlebars, consider adding bar end plugs. These small accessories not only add a stylish touch but also prevent any dirt, moisture, or debris from accumulating inside the handlebars. Simply insert the bar end plugs into the open ends of the handlebars, ensuring a secure fit.

Troubleshooting
While installing handlebar grips is a relatively straightforward process, you may occasionally encounter some issues. Here are a few common troubleshooting tips to help address any problems that may arise.
Grip Slipping Issues
If you experience grip slipping during rides, it’s crucial to address the issue promptly. Start by ensuring that the handlebars are clean and free from any residue that might affect the grip’s adhesion. If necessary, remove the grip and reapply grip glue or spray, following the instructions provided. Additionally, check that the grip is aligned properly and that it fits securely onto the handlebars. Adjustments may be needed to achieve a more secure and slip-resistant grip.
Overly Tight or Loose Grips
In some cases, you may find that the grips are either too tight or too loose on the handlebars. If the grips are too tight, they may be difficult to install or adjust. In this case, consider using lubricant to facilitate the sliding process. If the grips are too loose, you may need to remove them and apply additional grip glue or spray to ensure a more secure fit. Remember to strike a balance between a firm grip and the ability to make adjustments if needed.
Safety Tips
As with any bike-related activities, it’s important to prioritize safety when installing handlebar grips. Here are a few safety tips to keep in mind during the installation process.
Wearing Protective Gloves
To protect your hands from potential injuries while handling tools or gripping the handlebars, it’s recommended to wear protective gloves. Gloves provide an added layer of protection against sharp edges or slipping tools, reducing the risk of cuts or bruises. Additionally, gloves can help maintain a firm grip and prevent any accidental slips during the installation.
Testing the Grips
Once the installation is complete, it’s crucial to test the grips before heading out on your mountain bike. Take a moment to grasp the handlebars firmly and ensure that the grips feel comfortable and secure. Wiggle the grips slightly to check for any movement or slippage. If everything feels stable and secure, you’re ready to hit the trails!
Maintaining Handlebar Grips
To prolong the lifespan of your handlebar grips and ensure optimal performance, it’s important to maintain them properly. Regular cleaning and periodic replacement are key to keeping your grips in top condition.
Cleaning and Protecting Grips
Handlebar grips can accumulate dirt, sweat, and other debris during rides, affecting their grip and overall performance. Regularly clean your grips using mild soap and water or a specialized grip cleaner. Gently scrub the grips to remove any dirt, and rinse them thoroughly. After cleaning, make sure to dry the grips completely before your next ride. Consider using a specialized grip protector or conditioner to maintain the grip’s durability and prevent premature wear.
Replacing Worn-out Grips
Over time, handlebar grips can become worn out, losing their grip and comfort. It’s important to regularly inspect your grips for signs of wear, such as visible tears, cracks, or a significant decrease in grip effectiveness. If your grips show signs of wear or have become uncomfortable, it’s time to replace them. Installing new grips will not only restore grip performance but also enhance your overall riding experience.
FAQs
Here are answers to some frequently asked questions about handlebar grip installation:
How often should handlebar grips be replaced?
The frequency at which handlebar grips should be replaced can vary depending on various factors such as usage, riding conditions, and grip material. As a general guideline, it’s recommended to inspect your grips regularly and replace them when you notice signs of wear or a significant decrease in performance. On average, handlebar grips can last anywhere from several months to a couple of years, depending on these factors.
Can I reuse my old grips?
While it may be possible to reuse your old grips, it’s generally not recommended. Over time, grips can lose their grip effectiveness and comfort, making them less suitable for reuse. Additionally, old grips may show signs of wear, such as cracks or tears, which can compromise their performance and safety. It’s best to invest in new grips to ensure optimal grip performance and riding experience.